
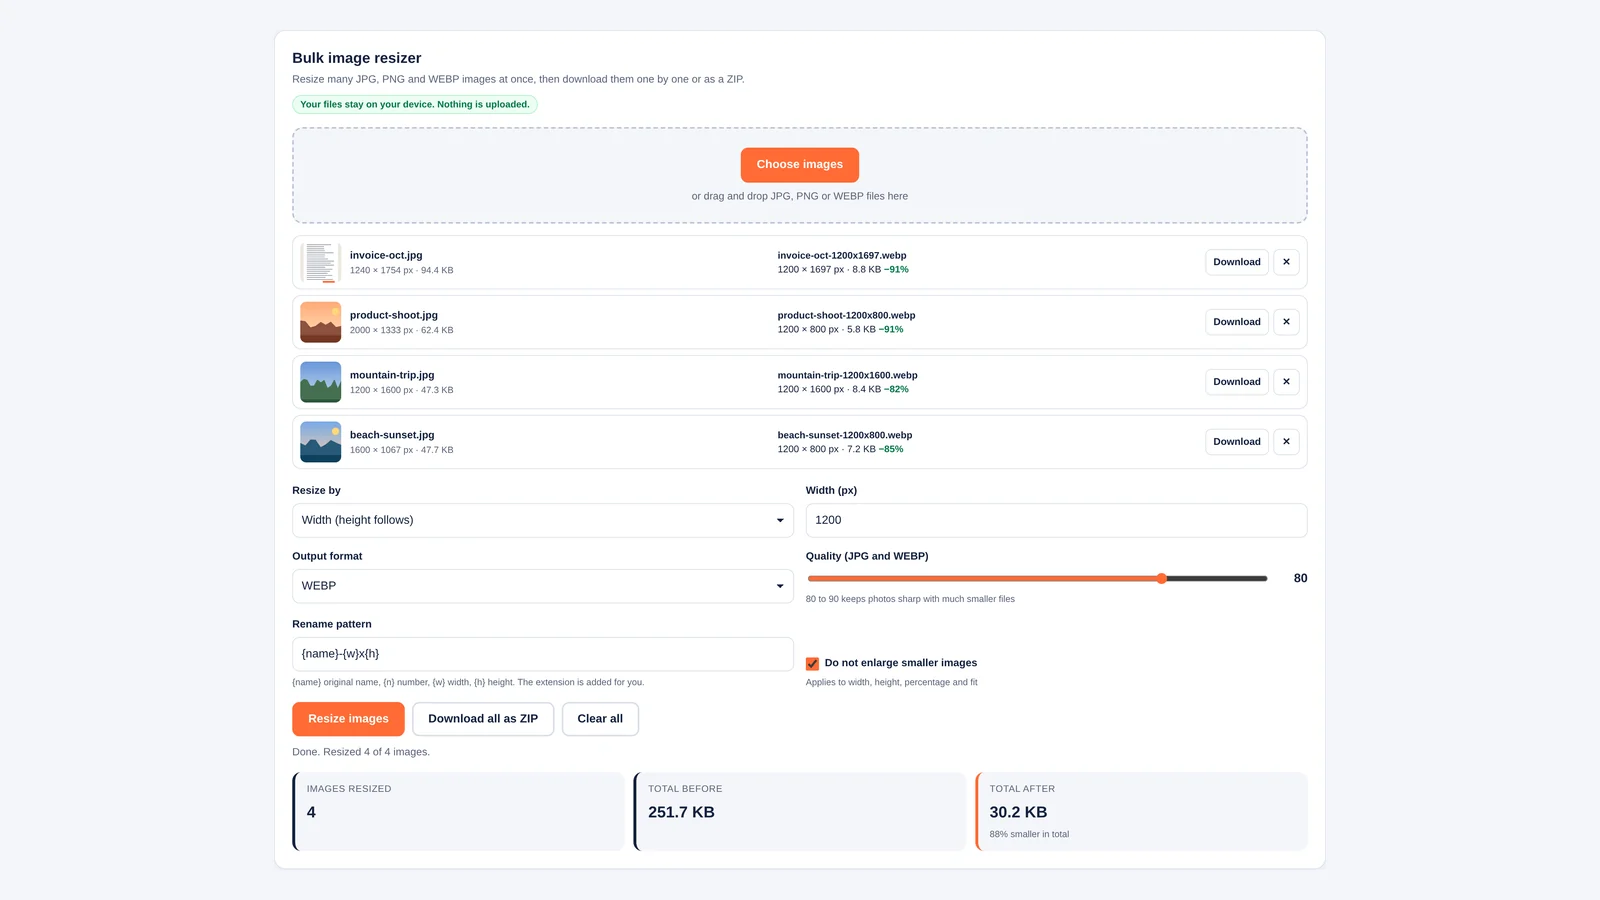
To resize many images at once, drop them into the tool below, set a width, height or percentage, choose JPG, PNG or WEBP and press Resize images. You can download each file on its own or get them all in one ZIP. The resizing happens in your browser, so product shots, client photos and ID scans never leave your device.
Phone cameras save photos far bigger than a website, marketplace listing or email needs. A batch of twenty 12-megapixel pictures can weigh more than 50 MB. Brought down to 1,200 or 1,600 pixels wide, the same set usually fits in a few megabytes and looks the same on screen.
Fit, Fill or Stretch, Output Formats and Rename Patterns
- Resize by width, height, both, or a percentage. Width-only and height-only always keep the aspect ratio.
- With both a width and a height, choose fit (keep the shape inside the box), fill (crop to the exact size) or stretch (exact size, shape may distort).
- Save as the original format, JPG, PNG or WEBP, with a quality slider for JPG and WEBP.
- A rename pattern such as {name}-{w}x{h} or product-{n} names every file for you, and each row shows the size before and after.
- Location and camera metadata are not copied to the resized files.
Bulk image resizer
Resize many JPG, PNG and WEBP images at once, then download them one by one or as a ZIP.
Your files stay on your device. Nothing is uploaded.
or drag and drop JPG, PNG or WEBP files here
Images resized
–
Total before
–
Total after
–
Resizing happens in your browser using the canvas API. Transparent areas turn white in JPG output. Photo metadata such as location is not copied to the resized files.
How to Resize Images in Bulk
- Add your images: press Choose images or drag JPG, PNG and WEBP files onto the box. Each one appears in the list with its pixel size and file size.
- Choose how to resize: Width (height follows), Height (width follows), Width and height, or Percentage. Type the size you need.
- Pick a format and quality: Same as original keeps each file’s type. Quality 80 to 90 suits most photos.
- Set the file names: edit the rename pattern. The right extension is added for you, and duplicate names get -2, -3 and so on.
- Resize and download: press Resize images, check the before and after sizes, then use Download on each row or Download all as ZIP.
Changing any setting clears the previous results, so what you download always matches what is on screen. Press Resize images again after a change.
Fit, Fill or Stretch: What Each Option Does
The three options only matter when you set both a width and a height. With a 500 × 500 box, a 3,000 × 2,000 photo came out of the tool like this in our tests.
| Option | Aspect ratio | Output | Best for |
|---|---|---|---|
| Fit inside the box | Kept | 500 × 333 | Galleries, email, anything where the whole picture must show |
| Fill the box and crop edges | Kept | 500 × 500, sides trimmed equally | Square thumbnails, profile photos, product grids |
| Stretch to exact size | Ignored | 500 × 500, squashed | Rarely: only when a system demands exact pixels and distortion does not matter |
Fit uses the smaller of the two scale factors: min(500 ÷ 3,000, 500 ÷ 2,000) = 0.1667, so 3,000 × 0.1667 = 500 and 2,000 × 0.1667 = 333. Fill uses the larger factor, 0.25, which makes the picture 750 × 500, and then trims 125 pixels from each side.
Do not enlarge smaller images is ticked by default. With it on, a 600-pixel-wide picture stays at 600 pixels when you ask for 1,200, because blowing it up adds file size without adding detail. Fill and stretch always produce the exact size you ask for.
Which Format Should You Choose?
| Format | Strength | Watch out for |
|---|---|---|
| JPG | Small files for photos, opens everywhere | No transparency; transparent areas turn white |
| PNG | Lossless, keeps transparency, crisp for logos and screenshots | Large files for photos; the quality slider does not apply |
| WEBP | Usually smaller than JPG at similar quality, supports transparency | Some older software and upload forms do not accept it |
For a website or online shop, WEBP at quality 80 is a strong default. For marketplaces, government portals and email attachments that might be opened on old systems, JPG is the safe choice. Keep logos and screenshots with text in PNG.
Worked Example: Preparing Product Photos
A small online seller has 3,000 × 2,000 product photos and wants 1,200-pixel-wide images for the shop plus square thumbnails. We ran this flow with a 2.52 MB test image of that size:
- Shop images: Width 1,200, Same as original, quality 85, pattern {name}-{w}x{h}. The photo came out as big-photo-1200×800.jpg at 183 KB, about 93% smaller. Height follows the width: 2,000 × 1,200 ÷ 3,000 = 800.
- Thumbnails: Width and height 500 × 500, Fill, JPG, quality 70, pattern thumb-{n}. Every file came out exactly 500 × 500, named thumb-01.jpg, thumb-02.jpg and so on.
- Download: Download all as ZIP saved one resized-images.zip file holding the whole batch.
Real photos compress differently from a test image, so your percentages will vary. The tool shows the exact before and after size for each file, plus totals, so you see the saving straight away.
Common Sizes Worth Knowing
- Blog and website images: 1,200 to 1,600 pixels wide covers most content columns, including on high-density screens.
- Email attachments: 1,024 to 1,600 pixels on the long side keeps a dozen photos well under typical attachment limits.
- Documents for printing or PDFs: 1,600 to 2,400 pixels on the long side is plenty for an A4 page. Our image to PDF converter then turns the set into one file.
- Thumbnails and avatars: 300 to 500 pixels square, using Fill.
Social networks and marketplaces publish their own recommended sizes and change them from time to time, so check the platform’s help page before a big batch.
Tips for Sharp, Light Images
- Resize once from the original: each JPG save loses a little detail, so start from the camera file rather than an already-shrunk copy.
- Do not go below quality 60 for photos: blocky patches appear in skies and skin. For text-heavy images, use PNG instead.
- Rotate on your phone first: photos follow the rotation your browser shows. If a thumbnail is sideways, fix it in the gallery app before resizing.
- Know that metadata is dropped: GPS location and camera details are not copied, which is good for privacy. If you need them, keep the originals.
- Shrinking a PDF instead? If your images are already inside a PDF, use the PDF size reducer.
Printing a flyer with your resized product shots? A code from our QR code generator can link it to your shop. More free tools are on the Bizolaunch tools page.
Keeping Aspect Ratio, Bigger PNGs and Batch WEBP Conversion
How Do I Resize Multiple Images at Once Without Uploading Them?
Use a tool that works inside the browser, like this one. Select all your images, set the size and press Resize images. The files are processed on your device with the browser’s canvas feature and are never sent to a server.
How Do I Keep the Aspect Ratio When Resizing?
Resize by width or by height alone and the other side is worked out for you. If you set both, choose Fit to keep the whole picture or Fill to keep the shape and crop the edges.
Why Is My Resized PNG Bigger Than Before?
PNG is lossless, so a photo saved as PNG can be larger than the original JPG even at a smaller size. Choose JPG or WEBP for photographs.
Can I Convert Images to WEBP in Bulk?
Yes. Set Output format to WEBP and pick a quality. To change only the format, choose Percentage and enter 100. If a browser cannot write WEBP, the tool saves PNG instead and tells you.
Is There a Limit on How Many Images I Can Resize?
There is no set limit. The practical limit is your device’s memory. Batches of dozens of phone photos work well on a laptop. On a phone, work in smaller groups.